
TL;DR:
- At-home biomarker testing provides accurate blood data to identify nutrient deficiencies beyond diet estimates.
- Proper sample collection and timing are crucial for reliable results and trend analysis.
- Use test results as part of a broader health strategy, consulting professionals for abnormal findings.
You eat well, take your supplements, and still wonder if your body is actually getting what it needs. Diet tracking apps feel precise, but they can be off by up to 60% when it comes to real nutrient intake. That gap between what you think you’re consuming and what your body actually absorbs is where health goals quietly fall apart. At-home biomarker testing closes that gap with real blood data, not estimates. This guide walks you through exactly how to collect your sample, read your results, and use that data to make smarter decisions about your nutrition and wellness.
Table of Contents
- What you need to track nutrient levels at home
- Step-by-step: Collecting and shipping your sample
- Understanding your results: Reference ranges and optimal levels
- Common troubleshooting and pitfalls
- Our take: The real value and risks of at-home nutrient tracking
- Take your nutrient tracking to the next level
- Frequently asked questions
Key Takeaways
| Point | Details |
|---|---|
| At-home kits streamlining | Modern kits let you track nutrient levels from home using simple finger-prick samples. |
| Reference ranges matter | Knowing both normal and optimal ranges helps you interpret your results for peak wellness. |
| Trends are more valuable | Monitoring changes over time gives deeper insight than relying on a single snapshot. |
| Expert guidance needed | Always confirm abnormal results and consult a professional to avoid health risks. |
| Apps aren’t enough | Diet apps can’t substitute for actual blood biomarker tracking when optimizing nutrients. |
What you need to track nutrient levels at home
Before you collect your first sample, getting organized saves you from common mistakes that can compromise your results. Think of this as your pre-flight checklist: every item matters, and skipping one can mean repeating the test.
A standard at-home nutrient testing kit includes everything you need for a clean, accurate sample. According to how to track vitamin levels naturally, a proper kit requires blood cards, finger-prick lancets, and antiseptic wipes as the core components. Most kits also include a prepaid return envelope, a biohazard bag for the sample card, and a step-by-step instruction sheet.
| Kit component | Purpose |
|---|---|
| Lancet device | Creates a small, controlled puncture on your fingertip |
| Blood collection card | Absorbs and preserves your blood sample for lab analysis |
| Antiseptic wipes | Cleans the puncture site before and after collection |
| Prepaid return envelope | Ships your sample safely to the lab |
| Biohazard bag | Protects the sample card during transit |
Here’s what you need to know about timing and preparation:
- Fasting is not required for most micronutrient panels, including vitamins, minerals, and amino acids
- Hydrate well the morning of your test; dehydration makes blood harder to collect
- Avoid vigorous exercise for 24 hours before testing, as it can temporarily shift certain biomarker values
- Mail your sample within 24 hours of collection to prevent degradation of the blood card
- Choose a weekday for collection so your sample doesn’t sit in a postal facility over the weekend
Pro Tip: Warm your hands under hot water for 60 seconds before the finger prick. It increases blood flow to the fingertips and makes collecting a full sample much easier, especially in cooler environments.
Once your sample reaches the lab, results are processed and uploaded to a personal dashboard. This dashboard compares your values against established reference ranges, so you can immediately see where you stand. Understanding the at-home test process from collection to report helps set realistic expectations for turnaround time and what your report will show. If you’re new to this and wondering why testing matters at all, exploring testing for deficiencies gives important context on what untreated gaps can do to your energy, immunity, and performance over time.

Step-by-step: Collecting and shipping your sample
Once you’ve assembled your kit, it’s time to collect your sample. Follow these steps for best results.
- Wash your hands thoroughly with warm water and soap for at least 20 seconds. Dry completely.
- Clean your chosen fingertip (ring or middle finger works best) with the antiseptic wipe. Let it air dry fully before proceeding.
- Load the lancet device according to the instructions. Press it firmly against the side of your fingertip and release.
- Wipe away the first drop of blood with a clean gauze or tissue. The second and third drops are cleaner for collection.
- Gently massage your finger from the base toward the tip to encourage blood flow. Do not squeeze hard, as this can dilute the sample with tissue fluid.
- Fill the circles on the blood card completely. Each circle should be saturated from one side, not layered with multiple small drops.
- Let the card air dry flat for at least 30 minutes before packaging. Never fold or stack wet cards.
- Place the dried card in the biohazard bag, seal it, and insert it into the prepaid return envelope.
- Mail the sample the same day, or first thing the next morning at the latest.
“The sample must be mailed within 24 hours of collection. Delays risk sample contamination compared to clinical phlebotomy, where samples are processed immediately.”
| Step | At-home collection | Clinical phlebotomy |
|---|---|---|
| Blood draw method | Finger prick, self-administered | Venipuncture by trained staff |
| Sample volume | Small (dried blood spot) | Larger liquid sample |
| Processing speed | Mailed to lab within 24 hours | Processed same day |
| Convenience | High (done at home) | Lower (requires appointment) |
| Risk of user error | Moderate | Very low |
Pro Tip: Photograph your completed blood card before sealing the envelope. If there’s a question about sample quality, you’ll have a visual record to reference when contacting support.
For a deeper look at the full at-home sample collection process, including how samples are handled once they arrive at the lab, the step-by-step guide covers each stage in detail.
Understanding your results: Reference ranges and optimal levels
After your specimen has been analyzed, you’ll receive a report. Let’s decode what those numbers mean and how to use them to guide your wellness choices.
Reference ranges are the numbers printed next to your results, showing what the lab considers “normal.” But here’s the catch: reference ranges vary by lab, and the Vitamin D example makes this obvious. One lab might flag anything below 20 ng/mL as deficient, while another sets the cutoff at 30 ng/mL. Neither is wrong, but the difference matters when you’re deciding whether to supplement.
The more important distinction is between normal and optimal. A result that falls within the reference range simply means you’re not in a clinically concerning zone. Optimal means your levels support peak energy, immune function, cognitive performance, and recovery. These are different targets, and for health-conscious individuals, optimal is the real goal.
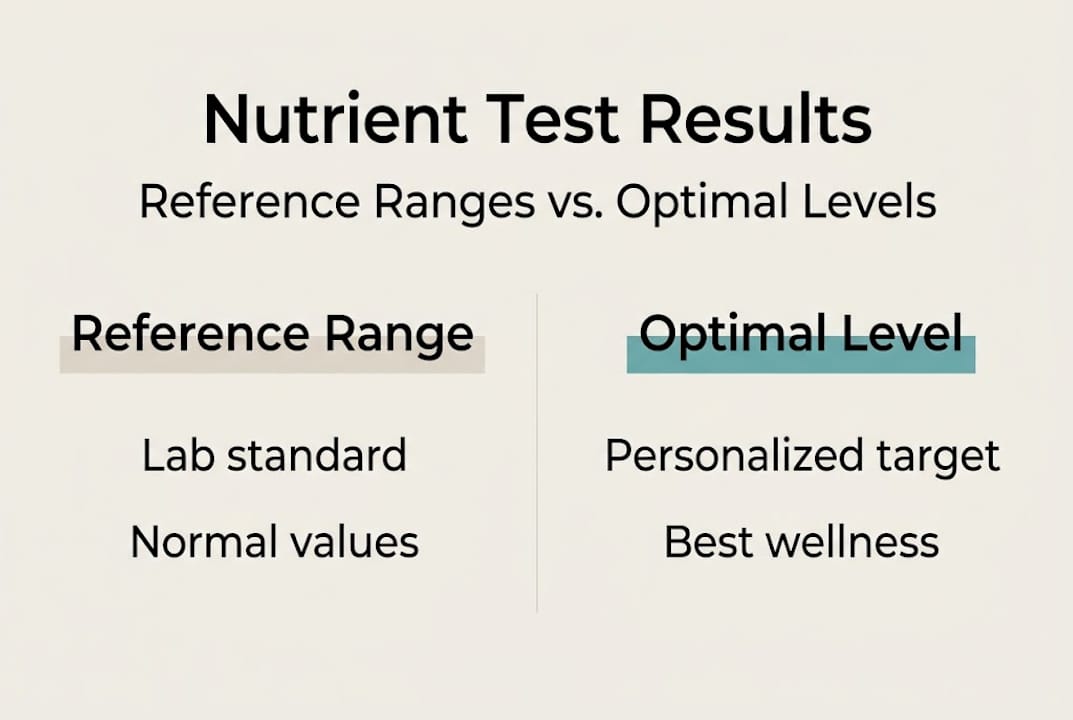
| Biomarker | Deficient | Normal range | Optimal for wellness |
|---|---|---|---|
| Vitamin D | Below 20 ng/mL | 20 to 50 ng/mL | 40 to 60 ng/mL |
| Ferritin (iron stores) | Below 12 mcg/L | 12 to 150 mcg/L | 50 to 100 mcg/L |
| Magnesium | Below 0.7 mmol/L | 0.7 to 1.0 mmol/L | 0.85 to 1.0 mmol/L |
| Vitamin B12 | Below 200 pg/mL | 200 to 900 pg/mL | 500 to 900 pg/mL |
How to use your results effectively:
- Look at trends, not just single snapshots. One result tells you where you are today. Three results over a year tell you whether you’re improving, declining, or stable.
- Flag values outside optimal ranges even if they’re technically “normal.” These are your early warning signals.
- Cross-reference related markers. Low ferritin and low B12 together tell a different story than either one alone.
- Consult a professional if any value falls outside the reference range entirely. At-home data informs, but it doesn’t replace clinical judgment.
Pro Tip: Keep a simple spreadsheet with your results from each test cycle. Add a column for any dietary changes or supplements you started. Over time, you’ll see exactly what’s working.
Working with a nutritionist using biomarkers can help you interpret trends with professional context. For a broader view of what’s worth tracking, the guide on wellness management biomarkers covers 85 markers and their roles in peak health. If you’re still building your foundation, understanding types of biomarkers is a useful starting point.
Common troubleshooting and pitfalls
Even with a solid system, mistakes happen. Here’s how to spot and fix common problems as you monitor your nutrient levels.
The most frequent issue is an incomplete or contaminated sample. If your blood card circles aren’t fully saturated, or if you squeezed the finger too hard and diluted the sample, the lab may flag it as insufficient. This means repeating the test, which delays your results and wastes a kit.
Common problems and how to avoid them:
- Insufficient blood volume: Warm your hands more thoroughly and use a fresh lancet. Dull lancets require more pressure and produce less blood.
- Contaminated sample: Never touch the collection area of the blood card. Hold it by the edges only.
- Delayed mailing: If you miss the 24-hour window, discard the sample and retest. Split samples are often inconsistent, and degraded samples can produce misleading results.
- Misreading results: Don’t compare your values to a friend’s results. Reference ranges are population-based, and individual context always matters.
- Supplement misuse: Seeing a low result and immediately doubling your supplement dose without professional input is a real risk. More is not always better, and some nutrients are harmful in excess.
“At-home testing is convenient for athletes tracking performance biomarkers, but it is not a substitute for routine asymptomatic screening guided by a physician.”
Pro Tip: If a result surprises you, whether it’s much higher or lower than expected, retest once before taking action. A single anomalous result can reflect a collection error, not a true health issue.
For those using biomarker data to support training and recovery, the guide on biomarker testing for athletes covers the specific markers most relevant to performance. And for a grounded understanding of what these numbers actually represent, the role of biomarkers in health provides essential context.
Our take: The real value and risks of at-home nutrient tracking
At-home biomarker testing is genuinely powerful, but only when used with the right mindset. The real value isn’t in any single result. It’s in the pattern of data you build over months and years. Seeing your Vitamin D climb from 22 ng/mL to 52 ng/mL after a targeted protocol is motivating and actionable. That kind of feedback loop is hard to get any other way.
But there’s a risk that doesn’t get talked about enough. Experts warn that over-reliance on at-home tracking can create false reassurance, where people see a result in the “normal” range and assume everything is fine, even when symptoms suggest otherwise. Data without context is just numbers.
We believe the most effective approach treats at-home testing as one layer of a broader health strategy, not the whole picture. Combine your results with lifestyle data, professional input, and honest self-assessment. Understanding how data transforms personalized wellness is the shift that separates reactive health management from proactive optimization. Test with purpose, interpret with humility, and act with guidance.
Take your nutrient tracking to the next level
You now have the framework to collect, ship, and interpret your own biomarker data with confidence. The next step is putting it into practice with tools built for exactly this purpose.
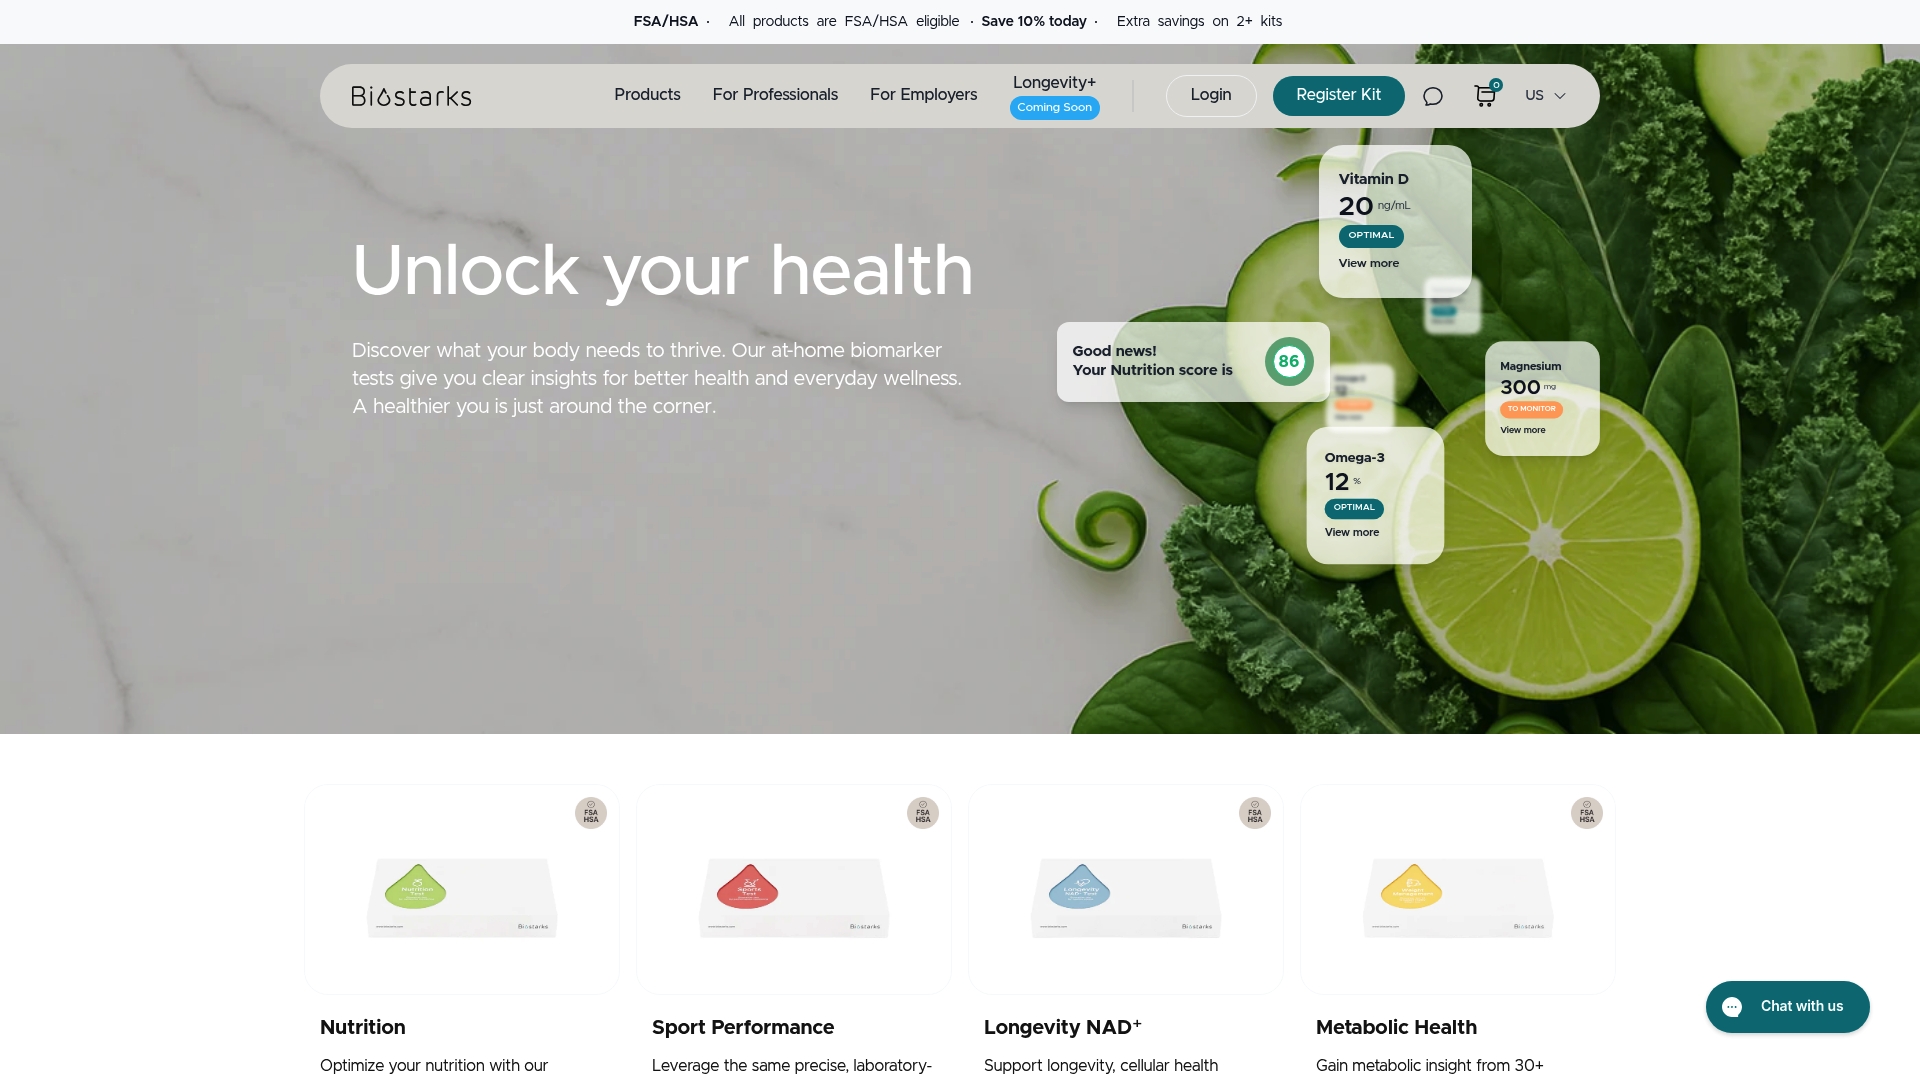
Biostarks at-home nutrient tests use advanced Swiss mass spectrometry to analyze vitamins, minerals, amino acids, hormones, and metabolic markers from a simple finger-prick sample. Every report is designed to be clear, actionable, and easy to track over time. If you’re ready to move beyond guesswork and build a real picture of your internal health, start with the wellness optimization checklist to identify which biomarkers matter most for your goals.
Frequently asked questions
How accurate are at-home nutrient tests compared to clinical labs?
At-home tests offer genuine convenience but carry a higher risk of sample contamination and insufficient volume. Split samples are often inconsistent, making clinical labs the more reliable standard for confirming critical results.
How often should I track my nutrient levels for optimal wellness?
Testing three times per year gives you enough data points to spot meaningful trends and adjust your plan between cycles. Tracking trends over time is far more useful than relying on any single result.
Do diet tracking apps provide reliable information on nutrient levels?
No. Dietary tracking apps can be off by 40 to 60% and only estimate intake, not absorption. Blood biomarker testing is the only way to see what your body actually has available.
Should abnormal results from at-home tests be confirmed by a doctor?
Always. Confirm abnormal findings through clinical testing and consult a health professional before adjusting supplements, medications, or your care plan.


