

TL;DR:
- Proper sample collection is crucial for accurate laboratory health analysis, as quality impacts test validity and reliability. Using matched collection methods and following standardized protocols, whether at home or in clinics, ensures trustworthy results and meaningful health insights. Meticulous technique and adherence to instructions significantly enhance reproducibility and minimize false positives or negatives.
Sample collection is the deliberate process of obtaining biological specimens from an individual to assess health through laboratory analysis. In medical diagnostics and at-home biomarker testing, specimen collection covers blood, urine, saliva, nasal swabs, stool, and tissue samples. Each specimen type carries specific biological information, from infection markers to hormone levels, that a lab cannot measure without a properly collected sample. Whether you are visiting a clinic or using a kit from Biostarks, the quality of your sample determines the quality of every result that follows.
What is sample collection and what types are used?
Sample collection is defined as the systematic gathering of biological material from a person for the purpose of detecting infections, genetic markers, chemical changes, or biomarker concentrations in a laboratory setting. The industry term for this process is specimen collection, and both terms are used interchangeably across clinical and consumer health contexts. Understanding the difference between specimen types is the first step toward getting results you can trust.
The most common specimen types and their standard collection methods are:
- Venous blood: Collected by a phlebotomist using a needle and vacuum tube system. Used for comprehensive metabolic panels, lipid profiles, hormone assays, and vitamin levels.
- Capillary blood: Obtained via a fingerstick lancet. Used in at-home kits for glucose monitoring, cholesterol screening, and select biomarker panels.
- Urine: Collected as a midstream clean-catch sample. Used for kidney function, hormone metabolites, and drug screening.
- Saliva: Collected by spitting into a tube or using an absorbent swab. Used for cortisol rhythms, DNA analysis, and certain hormone panels.
- Nasal and throat swabs: Used primarily for respiratory pathogen detection, including influenza and SARS-CoV-2.
- Buccal swabs: Cheek cell collection for genetic testing and microbiome analysis.
- Stool samples: Collected at home and used for gut microbiome profiling, colorectal cancer screening, and parasite detection.
- Tissue biopsies: Performed clinically for pathology and cancer diagnosis.
The table below summarizes the most common specimen types alongside their standard collection method and primary health applications.
| Sample type | Collection method | Common applications |
|---|---|---|
| Venous blood | Needle and vacuum tube | Hormones, lipids, vitamins, metabolic markers |
| Capillary blood | Fingerstick lancet | Glucose, cholesterol, select biomarkers |
| Urine | Midstream clean-catch | Kidney function, hormone metabolites |
| Saliva | Absorbent swab or tube | Cortisol, DNA, microbiome |
| Nasal swab | Swab inserted to defined depth | Respiratory pathogens |
| Stool | At-home collection container | Gut health, colorectal screening |
Pro Tip: When using a capillary blood kit at home, warm your hand under warm water for two minutes before the fingerstick. This increases blood flow to the fingertip and reduces the need for repeated punctures, which can dilute the sample with tissue fluid.
Why does sample collection quality matter so much?
Sample collection quality is the single most critical factor determining whether a lab test accurately reflects your true health status. A poorly collected specimen does not just produce a slightly inaccurate result. It can generate a false negative that misses a real problem, or a false positive that triggers unnecessary follow-up testing and anxiety.
The consequences of poor technique are concrete. A venous blood draw with the tourniquet left on for more than one minute causes hemoconcentration, artificially elevating protein and cell counts. A nasal swab inserted too shallowly collects only surface mucus rather than the viral-load-rich cells deeper in the nasal passage. A urine sample contaminated with toilet water introduces foreign analytes that distort kidney function markers.
Specimen handling follows a defined chain of custody: patient preparation, collection technique, labeling, transport, and documentation. A failure at any single step can render the entire sample uninterpretable. Labs routinely reject specimens that arrive unlabeled, at the wrong temperature, or in the wrong tube type.
The best practices for maintaining sample integrity are:
- Prepare correctly. Follow fasting instructions, hydration guidelines, and medication timing as specified by the test protocol.
- Use the right technique. Match the collection method to the specimen type. Venous blood requires needle insertion protocols; swabs require defined insertion depth and motion.
- Label immediately. Write or affix the label at the moment of collection, not afterward. Include date, time, and patient identifier.
- Store at the correct temperature. Most blood samples require refrigeration within two hours. Saliva and urine have their own stability windows.
- Transport promptly. Ship specimens on the same day they are collected whenever possible. Delays degrade analyte concentrations.
- Document everything. Record collection time, any deviations from protocol, and the name of the collector.
Pro Tip: If you collect a sample and then realize you missed a fasting requirement, do not send it. Contact the testing provider to reschedule. A compromised sample wastes your time and money and can produce results that lead you in the wrong direction.
How to collect samples accurately at home for biomarker testing
At-home specimen collection has moved well beyond simple glucose strips. FDA-cleared self-collection kits now cover vaginal specimens for HPV molecular assays, respiratory antigen testing, and multi-biomarker blood panels. The regulatory standard for these kits requires that a lay user, following printed instructions alone, can collect a specimen of sufficient quality for the assay to perform as validated.
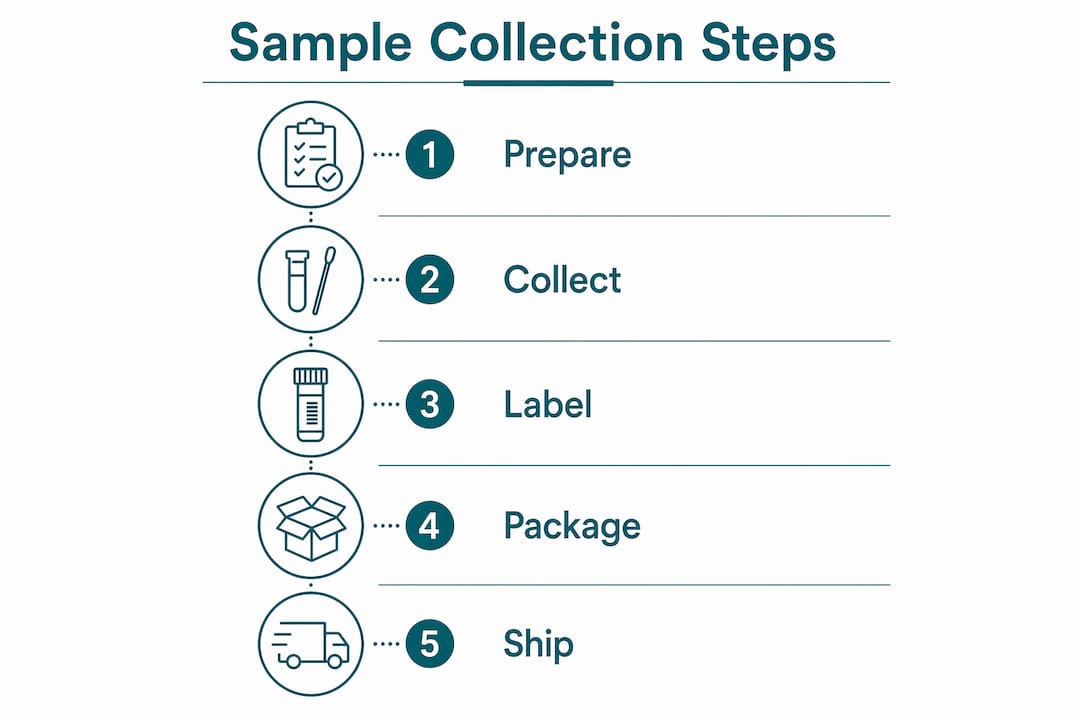
The general workflow for any at-home collection kit follows five steps:
- Step 1: Read the full instructions before opening anything. Timing windows, fasting requirements, and storage conditions are often buried in the middle of the leaflet. Missing them before you start is the most common user error.
- Step 2: Prepare your environment. Wash hands thoroughly. Lay out all components on a clean, dry surface. Check expiration dates on all reagents and collection devices.
- Step 3: Collect the sample. For nasal swabs, the Flowflex protocol specifies inserting the swab to a defined depth, rotating it in a circular motion, and maintaining contact for 15 seconds per nostril to capture sufficient viral material. For capillary blood, fill the collection tube to the indicated line without overfilling.
- Step 4: Process and package. Mix or transfer the sample as directed. For liquid-based tests, swirling in extraction buffer for 30 seconds and dispensing the precise number of drops into the cassette well is not optional. It is the step that controls analyte concentration.
- Step 5: Label and ship. Apply the pre-printed label or write the required information. Place the sealed specimen in the biohazard bag, then into the return mailer. Ship on the same day.
The step-by-step lab test process used by Biostarks follows this same structure, with detailed guidance tailored to each biomarker panel. For blood-specific collection, the at-home blood testing guide covers fingerstick technique, tube handling, and shipping in precise detail.
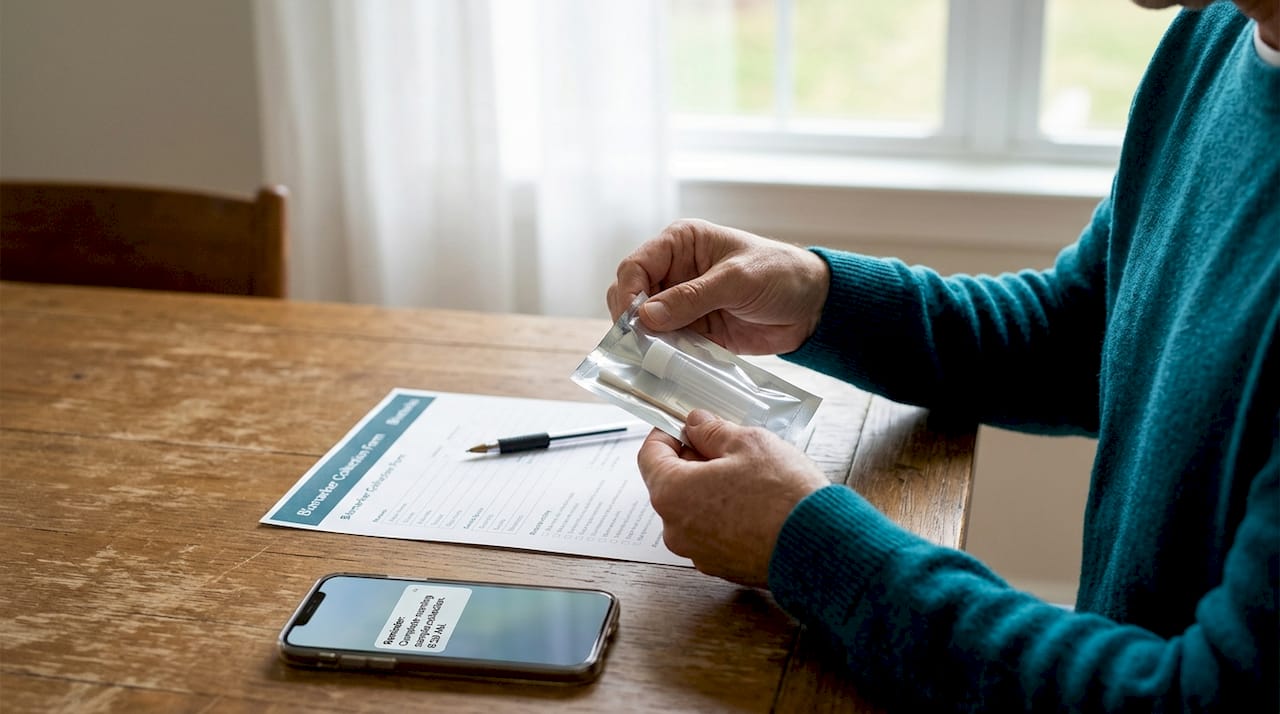
Pro Tip: Photograph your labeled sample and the completed collection form before sealing the package. If a specimen is lost in transit or arrives damaged, this documentation speeds up the replacement process significantly.
What sample collection techniques ensure reliable, reproducible results?
Reproducibility is the standard that separates a useful biomarker result from a one-time data point. A result is only meaningful if the same sample, collected under the same conditions, would produce the same output. Standardized protocols exist precisely to control the variables that introduce noise.
For venous blood draws, the Merck Manual specifies collecting within 30 seconds of tourniquet application and inverting tubes 6 to 8 times gently after collection. Shaking a blood tube causes hemolysis, which ruptures red blood cells and releases intracellular contents into the plasma, falsely elevating potassium and LDH readings. This is not a minor technical detail. It is the difference between a valid result and a rejected specimen.
The table below summarizes the most important protocol do’s and don’ts across common specimen types.
| Protocol step | Do | Do not |
|---|---|---|
| Tourniquet use (venous blood) | Remove within 30 seconds of needle insertion | Leave on for more than 1 minute |
| Tube mixing (blood) | Invert 6 to 8 times gently | Shake vigorously |
| Swab technique (nasal) | Insert to specified depth, rotate for 15 seconds | Swab only the nostril opening |
| Urine collection | Use midstream flow, clean-catch method | Collect first or last stream |
| Sample labeling | Label at time of collection with date and time | Label in advance or after transport |
| Temperature control | Refrigerate blood within 2 hours | Leave at room temperature overnight |
Timing also matters beyond the tourniquet. Cortisol samples collected outside the morning window (typically 7 to 9 a.m.) will show suppressed values that do not reflect the diurnal peak. Fasting lipid panels drawn after a meal will show elevated triglycerides that misrepresent baseline cardiovascular risk. These are not collection errors in the mechanical sense. They are protocol errors that produce equally misleading data.
Pro Tip: For any timed biomarker test, set a phone alarm the night before. Collect at the same time of day for every repeat test. Consistency in timing is what makes trend data meaningful over months.
Key takeaways
Accurate sample collection is the foundation of every reliable health test, and no amount of laboratory precision can compensate for a poorly collected or mishandled specimen.
| Point | Details |
|---|---|
| Definition of sample collection | Specimen collection is the systematic gathering of biological material for laboratory analysis of biomarkers, pathogens, or genetic data. |
| Collection method must match specimen | Venous blood, capillary blood, swabs, and urine each require distinct techniques to preserve analyte integrity. |
| Chain of custody is non-negotiable | Labeling, temperature control, and transport timing are as critical as the collection technique itself. |
| At-home kits follow FDA-cleared protocols | Self-collection kits are validated for lay users, but only when instructions on timing, depth, and processing are followed exactly. |
| Reproducibility requires standardization | Consistent timing, fasting status, and technique across repeat tests are what make biomarker trends meaningful. |
Why I think most people underestimate the collection step
Most people assume the laboratory does the hard work. They treat sample collection as a formality, something to get through before the real science begins. After years of working at the intersection of consumer health and precision diagnostics, I think that assumption is the single biggest source of misleading health data in personal testing.
The lab can only analyze what you give it. Swiss mass spectrometry, the technology Biostarks uses for its biomarker panels, is extraordinarily sensitive. That sensitivity is a double-edged sword. It detects real signals with precision, but it also amplifies collection errors. A hemolyzed blood sample does not just produce a slightly off potassium reading. It produces a result that looks clinically significant and is entirely artifactual.
What I have observed is that the people who get the most value from at-home testing are not necessarily the most health-literate. They are the most instruction-literate. They read the protocol, follow it precisely, and collect at the same time under the same conditions every time. Their trend data is clean. Their results are interpretable. They make better decisions because their data is trustworthy.
The future of consumer health testing depends on closing the education gap around collection technique. Regulatory clearance for home kits is advancing faster than public understanding of how to use them correctly. That gap is where false negatives live, where people conclude a test “didn’t work” when the test worked perfectly on a compromised sample. Better collection education is not a nice-to-have. It is the prerequisite for data-driven health to deliver on its promise.
— Romain
Start your health assessment with Biostarks
Biostarks, an AMR Labs SA company, provides at-home biomarker testing powered by advanced Swiss mass spectrometry. The collection kits are designed for precision and ease of use, with step-by-step instructions that walk you through every stage of specimen collection, from preparation to shipping. Each test analyzes vitamins, hormones, amino acids, lipids, minerals, and metabolic markers, then delivers a personalized report with clear, data-driven interpretations. If you are ready to move from guesswork to verified health data, explore the full range of Biostarks biomarker panels and find the test that matches your health goals. For healthcare providers looking to integrate home-based testing into patient care, professional testing resources are also available.
FAQ
What is sample collection in simple terms?
Sample collection, also called specimen collection, is the process of gathering a biological material such as blood, urine, or a swab from a person so a laboratory can analyze it for health information. The type of specimen collected depends on what the test is designed to detect.
What are the most common sample collection methods?
The most common methods include venous blood draws, fingerstick capillary blood collection, midstream urine catch, nasal or buccal swabbing, and saliva collection. Each method is matched to a specific specimen type and the analytes the test is designed to measure.
Why does improper sample collection cause false results?
Poor technique introduces variables that alter the biological material before it reaches the lab. For example, leaving a tourniquet on too long causes hemoconcentration, and a swab inserted too shallowly misses the target cells, both of which produce results that do not reflect the patient’s true condition.
Can I collect a reliable sample at home without medical training?
Yes, provided you follow the kit instructions exactly. FDA-cleared home collection kits are validated for use by lay users and are designed to control the key variables of technique, timing, and sample processing through precise written instructions.
How do I know if my at-home sample was collected correctly?
Follow the protocol step by step, check that the sample volume meets the indicated fill line, and confirm the specimen is labeled and shipped within the specified time window. If you deviated from any instruction, contact the testing provider before shipping, as an invalid sample produces results that cannot be trusted.
This content is for educational purposes only and does not constitute medical advice. Always consult with a healthcare professional before making changes to your health regimen.


